
Introduction
Cloudflare helps boost your website’s performance and security by acting as a content delivery network (CDN) and providing DDoS protection, caching, and DNS optimization. If you’re a MilesWeb customer, you can easily activate Cloudflare directly from your client area in just a few steps.
Steps to Activate Cloudflare from MilesWeb Client Area
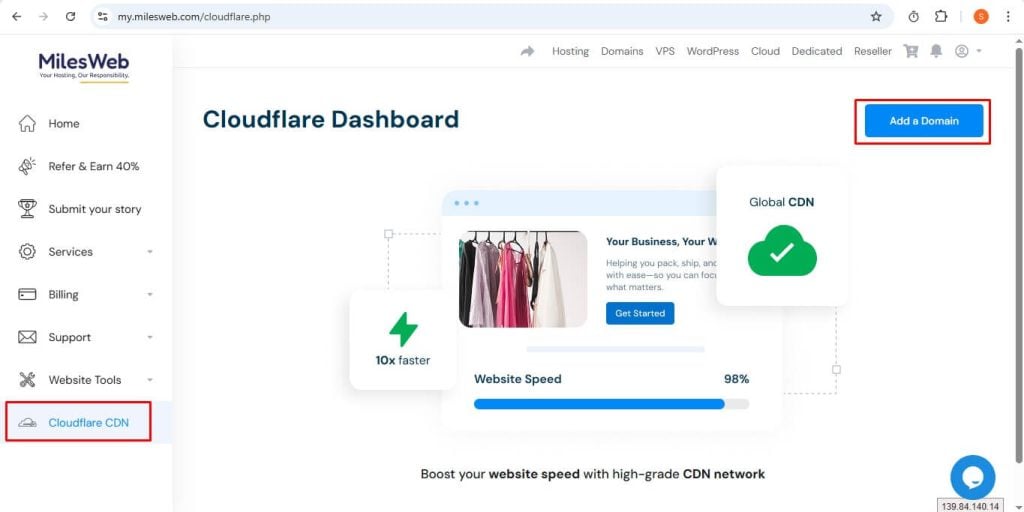
Step 1: Accessing the Cloudflare Dashboard
- Log in to your MilesWeb client area using your registered email ID and password.
- On the left-hand sidebar, locate and click on Cloudflare CDN under “Website Tools.” You will be presented with the Cloudflare Dashboard overview.
- Click the blue button labeled “Add a Domain” in the top right corner
Step 2: Adding Your Domain
- After clicking “Add a Domain,” a field will appear for “Domain Name.”
- Enter the domain name you wish to add (e.g., shirodesagar.tk) into the provided text box.
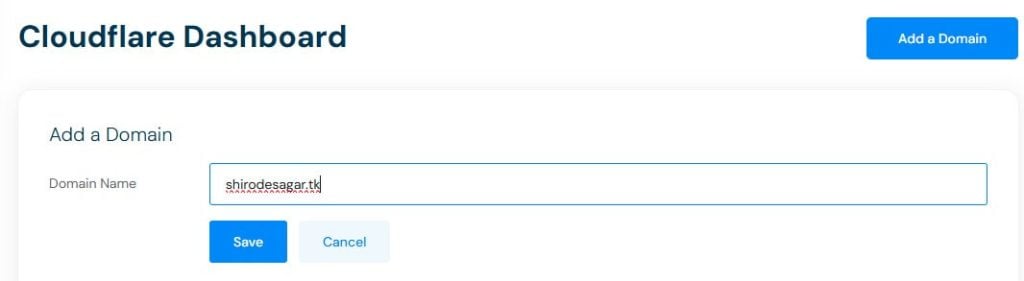
- Click the blue “Save” button.
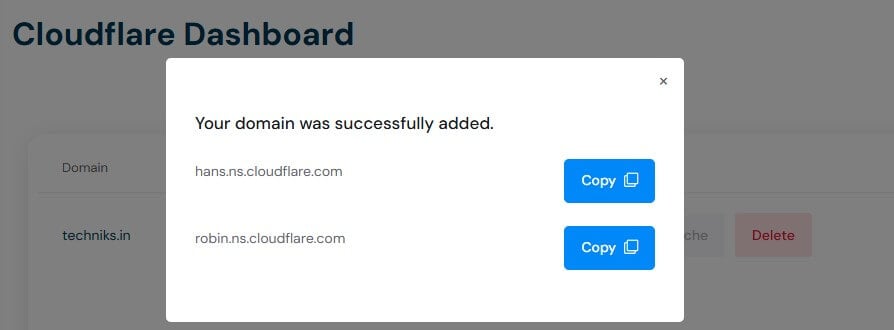
Step 3: Domain Successfully Added and Nameservers
- Upon successful addition, a pop-up window will confirm: “Your domain was successfully added.”
- This pop-up will also display the Cloudflare nameservers that you may need to update at your domain registrar.
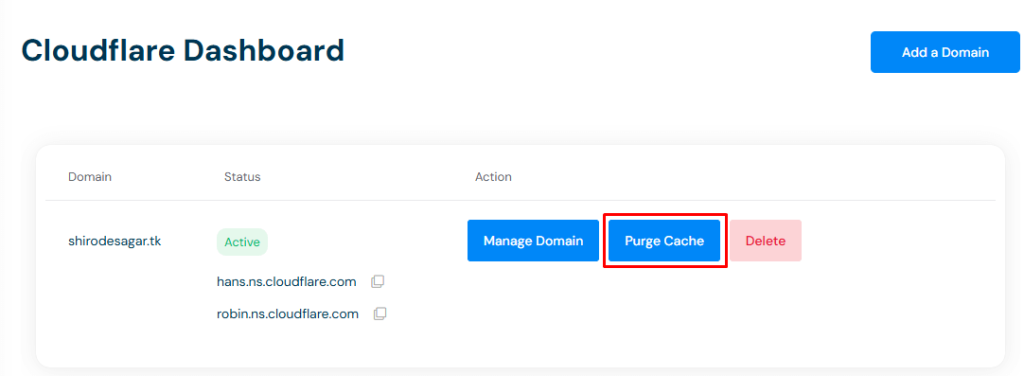
Step 4: Managing Your Added Domain
- After adding your domain, it will appear in a table with its Status marked as “Active.”
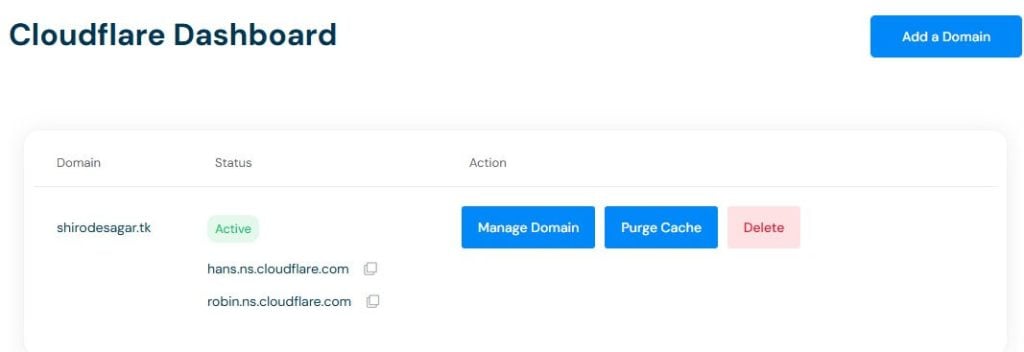
- Under the “Action” column, you will see three buttons:
- Manage Domain: Click this to access detailed Cloudflare settings for your domain.
- Purge Cache: Click this button to clear your website’s cache stored on Cloudflare’s servers. This is useful after making updates to your website.
- Delete: Use this to remove the domain from your Cloudflare dashboard.
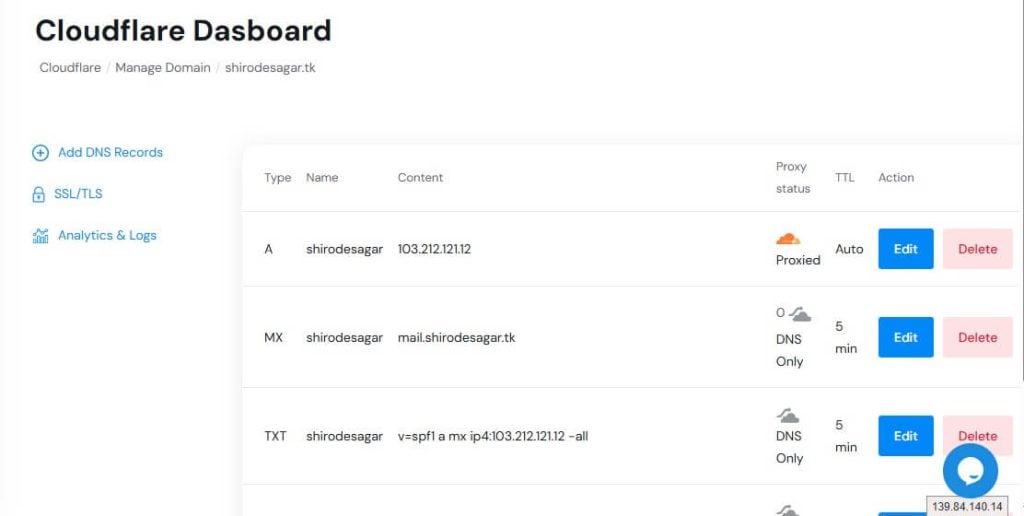
Step 5: Detailed Domain Management (DNS, SSL/TLS, Analytics)
- Clicking “Manage Domain” will take you to a detailed overview of your domain’s Cloudflare settings.
- On the left sidebar within this view, you can access
- Add DNS Records: Manage your domain’s DNS entries (A, MX, TXT, etc.). You can edit or delete existing records.
- SSL/TLS: Configure your website’s encryption mode.
- Analytics & Logs: View performance statistics for your domain.
Step 6: Configuring SSL/TLS Encryption Mode
- Click on “SSL/TLS” from the left sidebar.
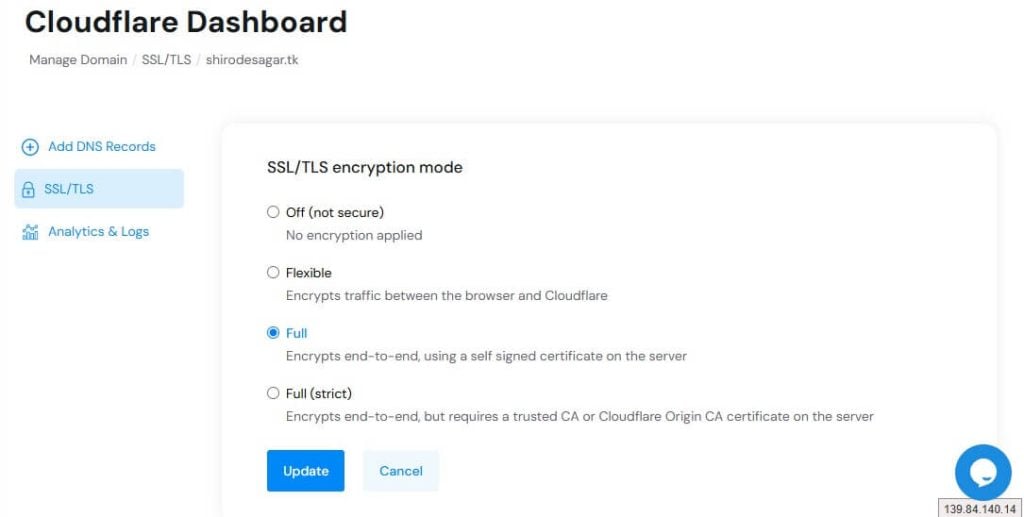
- You will see several encryption options:
- Off (not secure): No encryption applied.
- Flexible: Encrypts traffic between the browser and Cloudflare.
- Full: Encrypts end-to-end, using a self-signed certificate on the server.
- Full (strict): Encrypts end-to-end, but requires a trusted CA or Cloudflare Origin CA certificate on the server.1
- Select your desired encryption mode (e.g., “Full” is often a good balance).
- Click “Update” to apply your changes.
Step 7: Viewing Analytics and Logs
- Click on “Analytics & Logs” from the left sidebar.
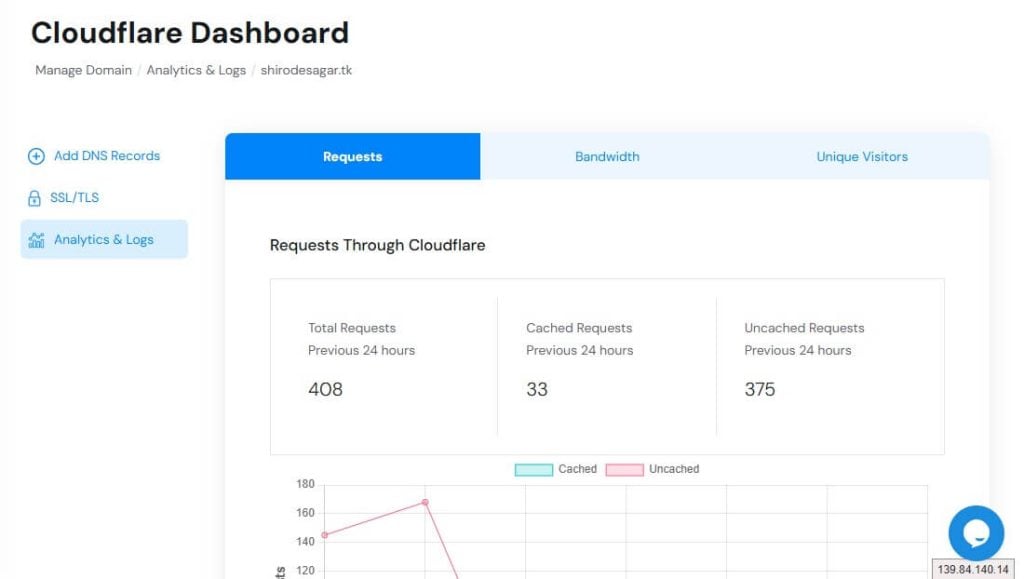
- This section provides insights into your website’s traffic through Cloudflare, including:
- Requests: Total requests, cached requests, and uncached requests over a specific period (e.g., previous 24 hours).
- Bandwidth: Data usage statistics.
- Unique Visitors: Number of distinct visitors to your site.
- A graph visually represents the requests, differentiating between cached and uncached.
Congrats! You have now successfully activated and configured basic Cloudflare settings for your domain from your MilesWeb client area!
Benefits of Using Cloudflare with MilesWeb
- Improved website speed through CDN caching
- DDoS and brute force protection
- Optimized DNS management
- Secure HTTPS with free SSL
Conclusion
If your domain’s nameservers are not yet pointing to MilesWeb or Cloudflare, you may need to update them to fully activate Cloudflare services.
If you face any issues while activating Cloudflare, feel free to reach out to MilesWeb support via Live Chat or Support Ticket.


