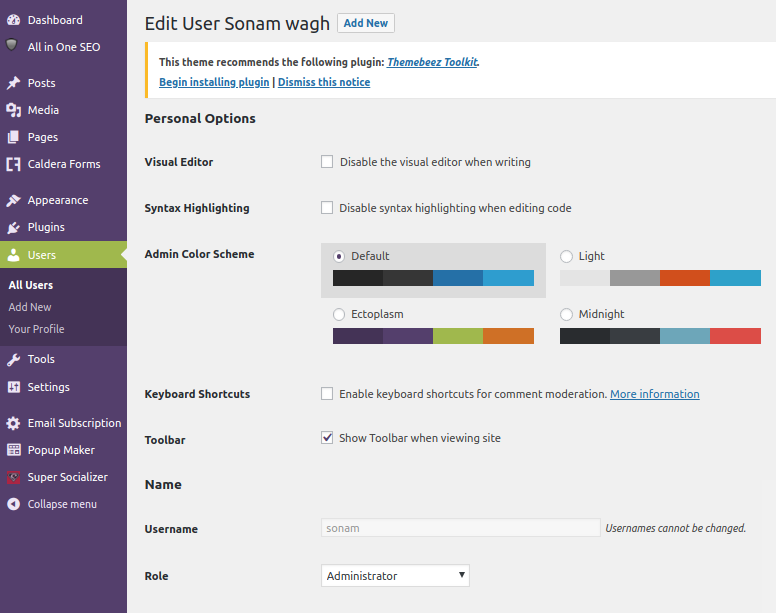
Are you a new WordPress user? Then you might have come across with this type of issue like changing the WordPress username. Unfortunately, you can’t do it, because it is written as “Username cannot be changed”. In such a situation, don’t get panic, you can follow these easy steps to change the username in your WordPress blog.
Steps to Change WordPress Username with Username Changer Plugin
One of the easiest ways to change your WordPress username is with the help of free plugin called “Username Changer”.
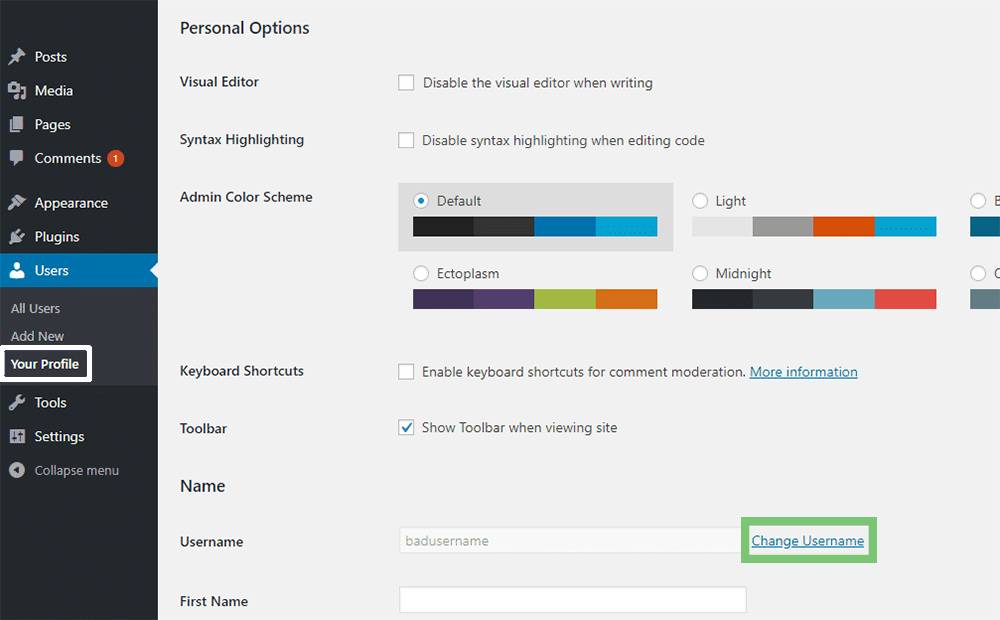
You have to install and activate this plugin. Next step is go to Users ===> Your Profile. Next to your username, you will get the option to Change Username.
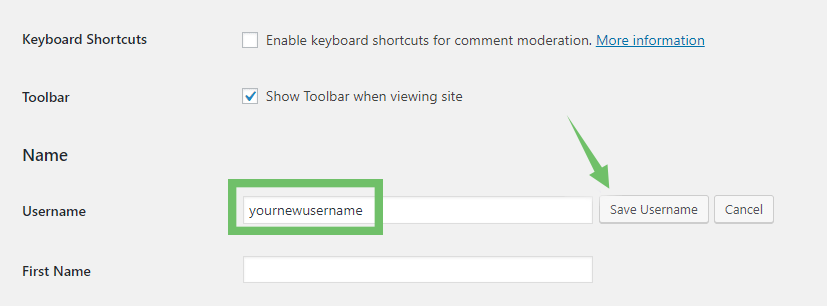
After clicking on that link, you’ll get an alternative to enter a new username. After mentioning the new username, just click on Save Username to make it live globally.
After saving the new username, you will get a message informing that username is saved successfully. For confirmation, you can log in again using your new username and the password will be the same.
Here, you are done.
If you’re using multiple usernames on your WordPress blog, then, in Setting ===> Username Changer, you can use same plugin and follow same steps to change the username.
Steps to Change WordPress Username by Creating/Deleting Accounts
Here, you have to follow three steps to change the username and those steps are:
• First, you have to create a new username
• After that transfer old username authorship to your new username
• Finally, you have to delete your old username
Step 1: First, you have to create a new username
If you’re a WordPress user then you have the right to create a new username. For this, you have to go to Users ===> Add New and create a new user.
Enter the name as per your demand in the username box and make sure you have set the administrator role to this account. This is applicable, when you are changing another user’s username.
As of now, you won’t be able to use the same email as your existing account. But, you can update it after deleting your original account in the next step.
Step 2: Delete Old Username
After adding the new user, you can log out from your WordPress dashboard and then again log back in using the new username that you have created.
Once you have logged in then go to the user’s tab in your WordPress dashboard and delete the old username.
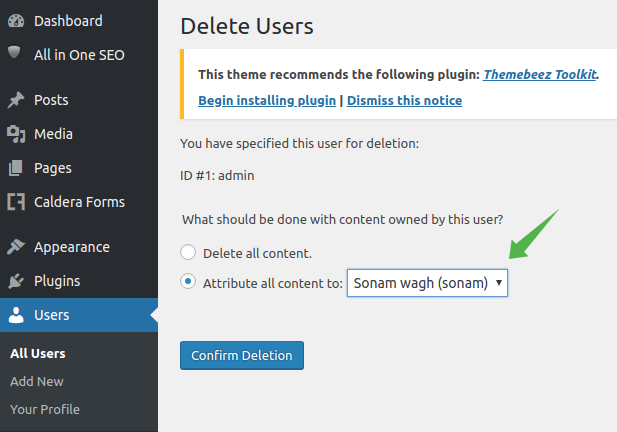
After clicking on delete tab, you will be redirected to the confirmation page. Over there, you’ll get two options, select the second option. This will indicate that all your existing posts and pages will get replaced with a new username – that is Sonam.
Click on “Confirm Deletion” option. After completing all the steps, you can log in again using your new login details.
Steps to Change WordPress Username Via phpMyAdmin
Further, it’s suggested to take back up of your database before doing the changes. If your WordPress blog is hosted on MilesWeb server then make sure you’ve taken the backup of the database from Backup Manager OR phpMyadmin.
In this way, here, I will explain the steps to change a WordPress username 100% manually.
Step 1: Access phpMyadmin
If you’re hosting your blog at MilesWeb, you can operate phpMyadmin from your cPanel. To do this, you have to log in to your cPanel account ==> click phpMyadmin.
Step 2: Browse To wp_users Table
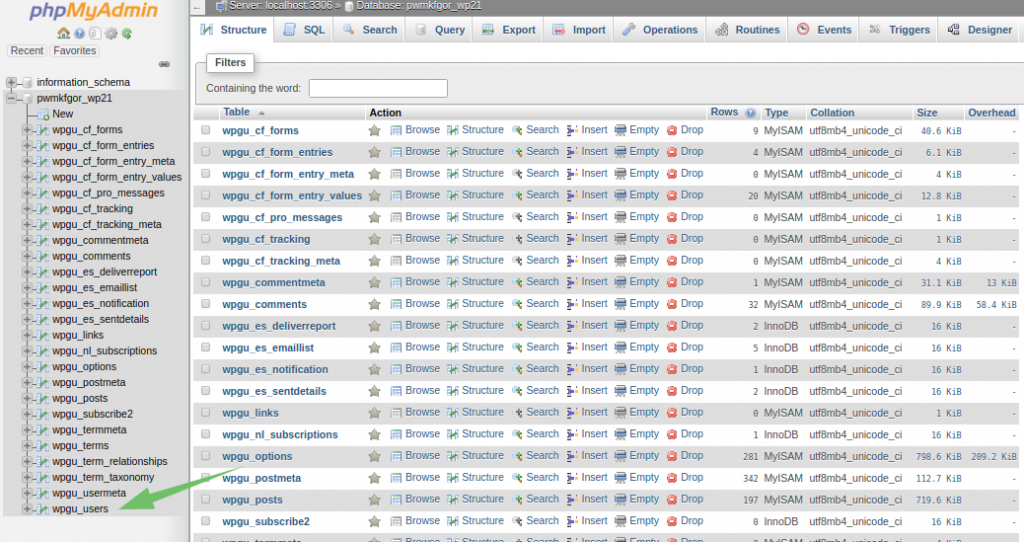
After clicking on phpMyadmin, you will get redirected to the dashboard of phpMyadmin. On your left-hand side, click on the wp_users table:
Step 3: Edit Username
After clicking on wpgu_users, you will get redirected to the user’s name list. Click on edit option near the username that you want to change.
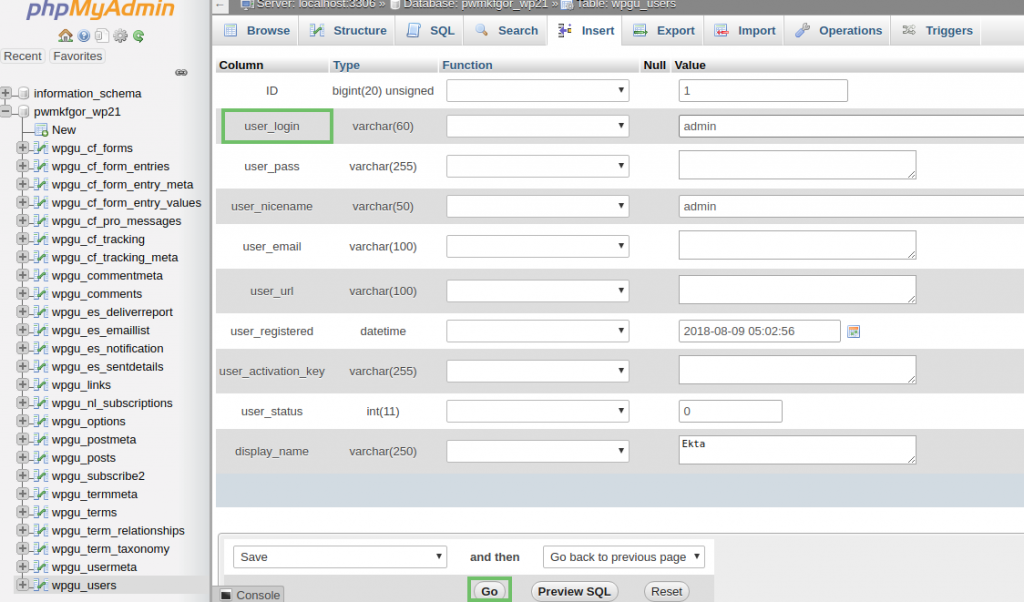
On the next tab, you have to enter the new username in the user_login field. After that click on Go in the bottom:
And finally, you have to log in to your WordPress dashboard using your new username without changing the email address and password.


