
What is AutoSSL?
Understanding AutoSSL from cPanel: AutoSSL is a cPanel utility that facilitates the procurement and installation of an SSL certificate issued by Let’s Encrypt. In other words, it’s a free SSL certificate issued for web owners to endorse secured business dealings over the network. It enhances website security, boosts user trust, and boosts search engine rankings by automatically securing your website.
Similar Read: How to Activate Let’s Encrypt SSL Certificate for Your Website?
How To Enable AutoSSL?
- Log into cPanel: Go to cPanel using the login credentials provided by your web hosting company.
- Locate the security: Search for the SECURITY option in cPanel. You will likely find this section filled with security tools and settings.
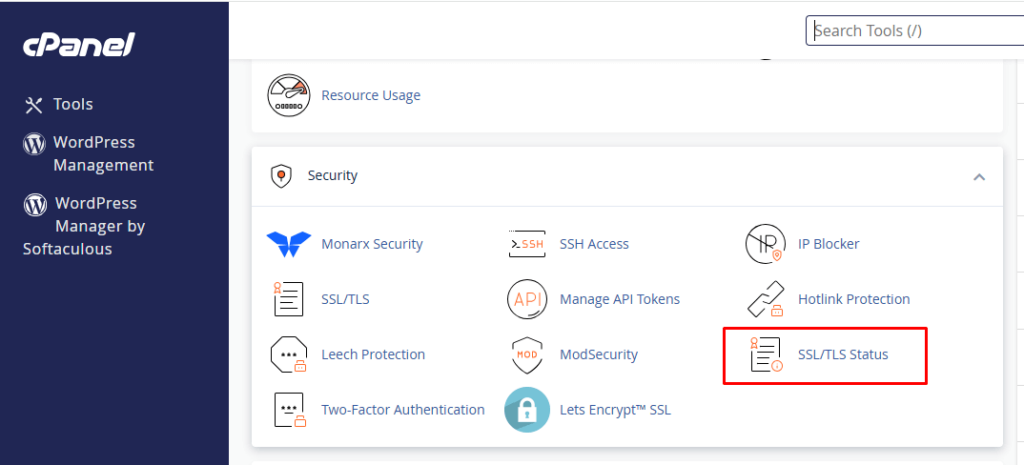
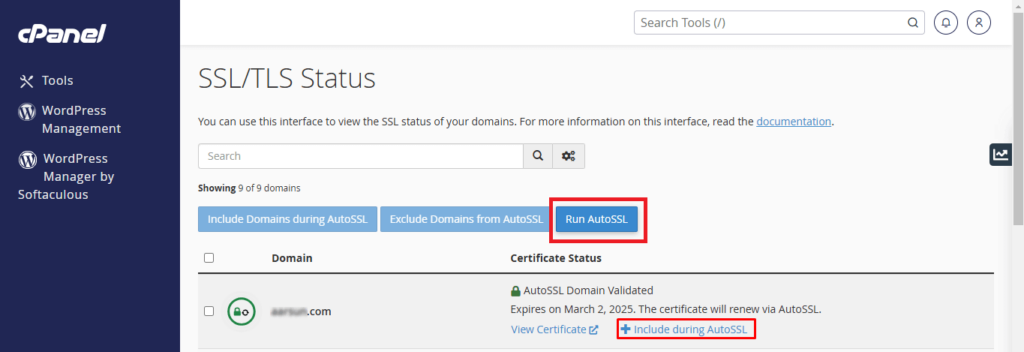
- Select SSL/TLS status: Again in the SECURITY section, search for the ‘SSL/TLS Status’ option. It will be used to inquire about the existing SSL certificates for your website and the controls for these certificates.
- Enable AutoSSL for your preferred domains: In the “SSL/TLS Status’ interface, you will be presented with a list of domains or subdomains that you own. Ensure that the boxes for all the domains that require protection under an SSL certificate are checked.
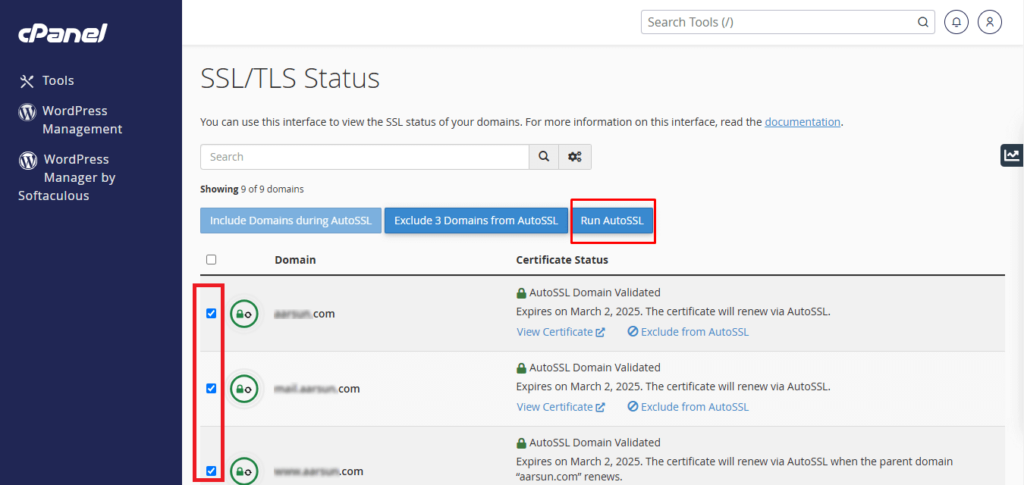
- Initiate AutoSSL: If you have clicked the selection of domains, the next step is to click on the “Run AutoSSL” button. Doing so will request and install the SSL certificates for the selected domains.
- Important Note: Please note that there might be a short waiting period (up to an hour) while the SSL certificates are applied.
Validating the SSL Certificate
If you want to check whether your certificate is installed on your domain, you can use external tools. For instance, SSL Shopper is one such tool used to see if the certificate was installed on your domain successfully.
Troubleshooting AutoSSL Errors: A Few Recommendations
Once you run AutoSSL, the padlock sign (icon) gets attached to your website. However, if your website is still showing ‘Not Secure’ or has no padlock when you enable the AutoSSL, then that could be due to several reasons:
1. Mixed Content
Confirm that there is no mixed content loaded on your website. Any mixed content could effectively mess with the SSL certificate, thereby rendering a secure connection impossible.
Mixed content is when a secure website loads resources over an insecure connection (like images or scripts). This breaks the secure connection, compromising user data and potentially harming your website’s search engine rankings.
2. Multiple Certificates
It is impossible to have Let’s Encrypt certificates if any certificate, self-signed or expired, was previously installed onto your domain.
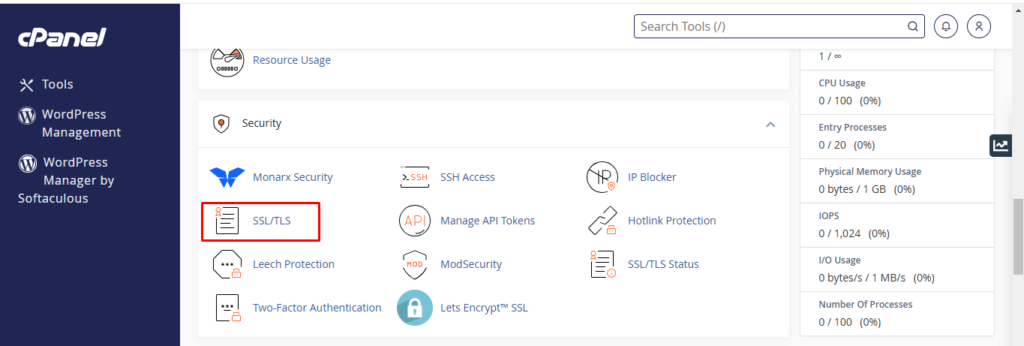
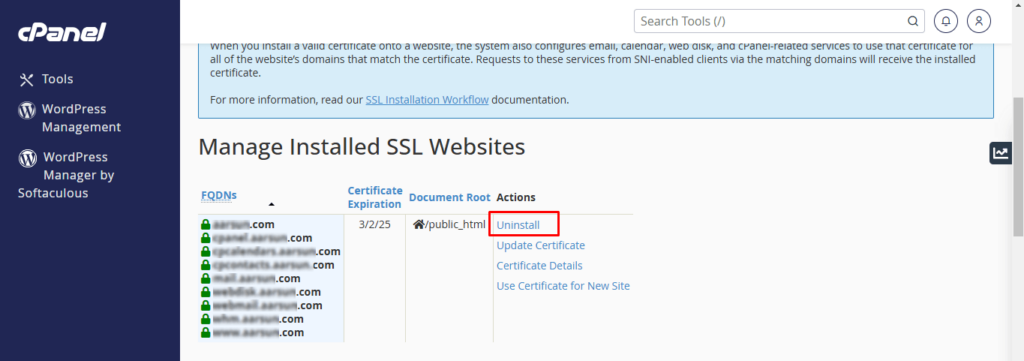
- To see any previous certificates installed, navigate to the cPanel ‘SSL/TLS’ section and press ‘Manage SSL Sites’ to see those certificates.
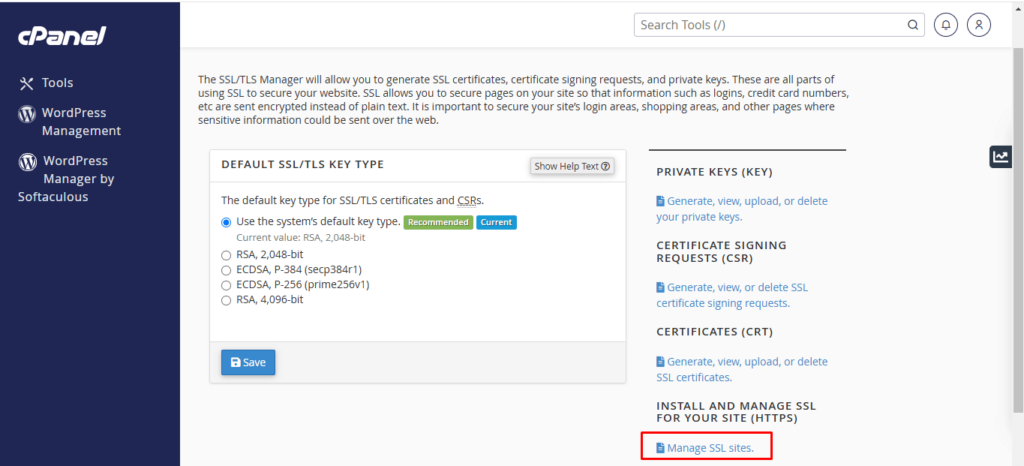
- If you observe any certificates that qualify as prior or invalid, make sure to remove those (uninstall them) and once again run AutoSSL under the ‘SSL/TLS Status’ for each of them.
3. Verification Problems for Domain
If you want Let’s Encrypt to trust you and issue the requested SSL certificate, you have to prove that you are the rightful owner of the domain in question. Here’s how to correct the verification problem:
4. Domain Name Servers (DNS)
First off, ensure your website is resolving using the IP address of your web hosting company. Use checking tools like “whatsmydns.net” to check the current IP of the A record of your domain. This also states it is mailed with your server IP, which is embedded in your provider’s hosting account information email.
Now if the IP addresses do not correlate, there is an indication that your website is not using the IP hosted by the hosting provider and hence seeking to install SSL in a different location or center.
5. AAAA Records
In cases when your A records are directed to your web host address but the nameservers are located elsewhere, then look for AAAA records on “whatsmydns.net.” Most DNS managers add irrelevant records that can affect AutoSSL validation and are not needed. If you find more than the recommended A records, then remove them.
6. Code Interference
Sometimes a certain code in a website may delay the initiation of AutoSSL, and this code is valid only during the reconciliation phase before the deployment check of any file or code. Adding the below snippet at the start of a website’s .htaccess file will avoid code interference.
RewriteCond %{REQUEST_URI} !^/[0-9]+\..+\.cpaneldcv$
RewriteCond %{REQUEST_URI} !^/\.well-known/acme-challenge/.+$
RewriteCond %{REQUEST_URI} !^/\.well-known/acme-challenge/[0-9a-zA-Z_-]+ $
RewriteCond %{REQUEST_URI} !^/\.well-known/pki-validation/[A-F0-9]{32}\.txt(?:\ Comodo\ DCV)?$
7. AutoSSL Suspended
When the ‘Run AutoSSL’ option is missing from the interface in the cPanel section, it indicates that AutoSSL is not switched on in the feature list. In such cases, reach out to your web hosting company’s reseller or system-level administrator to enable the AutoSSL feature for your account.
8. Excluding Domains (Optional)
Follow the different guides available through your web host directly when you face problems with some domain names and you want to exclude those from your list.
Installing and enabling SSL via AutoSSL in cPanel is an intuitive feature that allows you to automatically acquire free SSL certificates from Let’s Encrypt for your website (your domain). This not only raises user credibility and protection but also improves search engine optimization.
Always remember that making your site secure builds trust amongst your users and shows your responsible approach toward working in the online sphere because these attributes are indispensable in modern times.


