With every hosting created via WHM, you get the space and other significant features of the hosting package you have purchased. It is very easy to modify your hosting account quota within your WHM with the help of Account Functions feature. You will find the account quota set in your hosting package. But it is possible to upgrade or downgrade the account by allocating another package to it.
Check the below steps to modify your hosting account quota via WHM–
1. Log in to your WHM account.
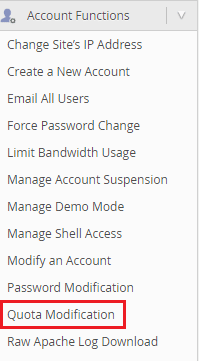
2. Click on Account Functions.

3. Then click on Quota Modification.
om
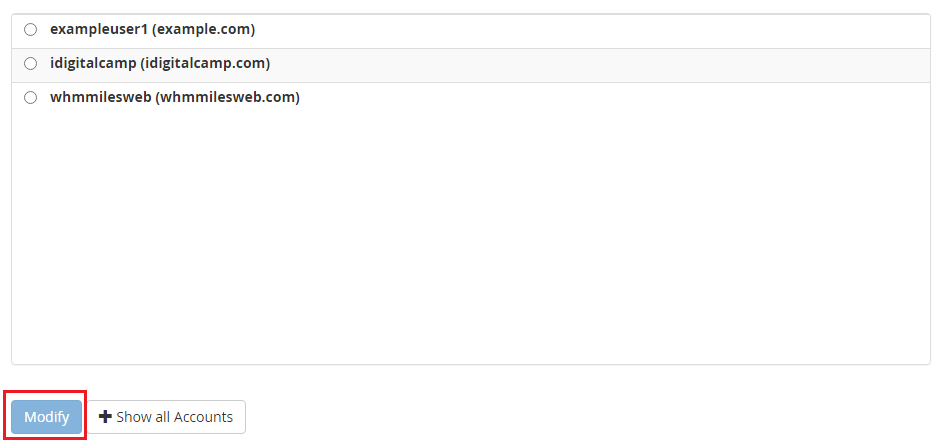
4. Select the account for which you want to change the quota.
5. Click on the Modify button.

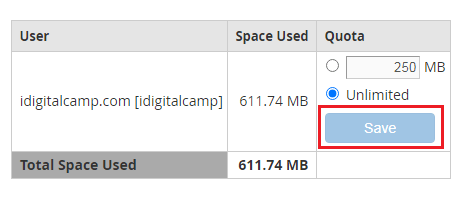
6. Change the hosting account quota as per your preference.
7. Click on the Save button.

In this way, you’ve successfully learned to modify the disk space quota for the selected hosting account.


